> ## Documentation Index
> Fetch the complete documentation index at: https://docs.adrop.io/llms.txt
> Use this file to discover all available pages before exploring further.
# Creating Audience Targeting
> Audience targeting displays ads to specific users based on user attributes (properties) and behavioral events. This guide explains how to create audience targeting using a local activity app as an example.
Create targeting options by combining user [properties](/targeting/property) and [events](/targeting/event).
***
## Creating Audience Targeting
### Step 1: Select Targeting Type
1. Click **Targeting → Audience** in the left menu.
2. Click the **Create Targeting** button.
**Auto-complete Targeting** (Age, Gender, Country, Language)
* Targeting options are automatically recommended.
* Targeting name cannot be changed.
**Custom Targeting**
* Configure targeting options directly using custom properties and events.
* Targeting name can be set freely.
### Step 2: Enter Targeting Name
(Custom targeting only) Enter the targeting name that will be displayed to advertisers.
### Step 3: Add Targeting Options
**For Auto-complete Targeting**
Click recommended targeting option cards to add them.
**For Custom Targeting**
1. Click the **+ Add Targeting Option** button.
2. Enter the targeting option name.
3. Set conditions.
* Click **+Filter** to add a property or event condition
* Select operator (equals, contains, greater than, less than, etc.)
* Enter value
4. Use **Add Condition** to combine multiple conditions if needed.
5. Click the **Add** button.
**Example 1: Property-based Targeting**
Combine `region` and `booking_count` properties to create "Regional User Tier" targeting.
| Targeting Option | Condition |
| --------------------- | ------------------------------------------------------------------ |
| **Seoul New User** | region is "Seoul" AND booking\_count \< 3 |
| **Seoul Active User** | region is "Seoul" AND booking\_count >= 3 AND booking\_count \< 10 |
| **Seoul Power User** | region is "Seoul" AND booking\_count >= 10 |
| **Busan New User** | region is "Busan" AND booking\_count \< 3 |
| **Busan Active User** | region is "Busan" AND booking\_count >= 3 AND booking\_count \< 10 |
| **Busan Power User** | region is "Busan" AND booking\_count >= 10 |
| **Jeju New User** | region is "Jeju" AND booking\_count \< 3 |
| **Jeju Active User** | region is "Jeju" AND booking\_count >= 3 AND booking\_count \< 10 |
| **Jeju Power User** | region is "Jeju" AND booking\_count >= 10 |
**Example 2: Combining Properties and Events**
Add event conditions for more precise targeting.
| Targeting Option | Condition |
| ------------------------------------- | -------------------------------------------------------- |
| **Seoul Users with Purchase History** | region is "Seoul" AND Purchase event occurred |
| **Cart Added but Not Purchased** | AddToCart event occurred AND Purchase event not occurred |
| **VIP Purchasers** | membership is "VIP" AND Purchase event occurred |
### Step 4: Save
Click the **Create Targeting** button to save.
### Bulk Audience Targeting Creation
You can create multiple targetings at once by uploading a file with targeting information.
Targetings are created based on each row in the uploaded file, making it useful when you need to quickly register a large number of targetings.
1. Navigate to Targeting > **Audience Targeting** menu.
2. Click the **Bulk Create Targeting** button in the upper right corner.
3. Download the **Targeting Creation Guide** file.
4. Fill in the file according to the input guide.
5. Upload the completed file to the bulk targeting creation window.
6. Click the **Create Targeting** button.
***
## Bundle Options
You can bundle multiple targeting options into one to offer to advertisers.
1. Click the created targeting card.
2. Check 2 or more targeting options.
3. Click the **Bundle Options** button.
4. Enter the option name and save.
5. Click the **Save** button.
Bundled options cannot be selected individually.
**Example: Bundling into 'Coastal' Option**
Bundle Busan and Jeju targeting options into a "Coastal" option.
| Parent Option | Included Targeting Options |
| ----------------------- | ----------------------------------- |
| **Coastal New User** | Busan New User, Jeju New User |
| **Coastal Active User** | Busan Active User, Jeju Active User |
| **Coastal Power User** | Busan Power User, Jeju Power User |
Options displayed to advertisers after bundling:
* Seoul New User, Seoul Active User, Seoul Power User
* **Coastal New User**, **Coastal Active User**, **Coastal Power User**
***
## Targeting Duration
You can set how long users remain in the audience after meeting targeting conditions. When users meet the conditions again within the set duration, the duration automatically renews.
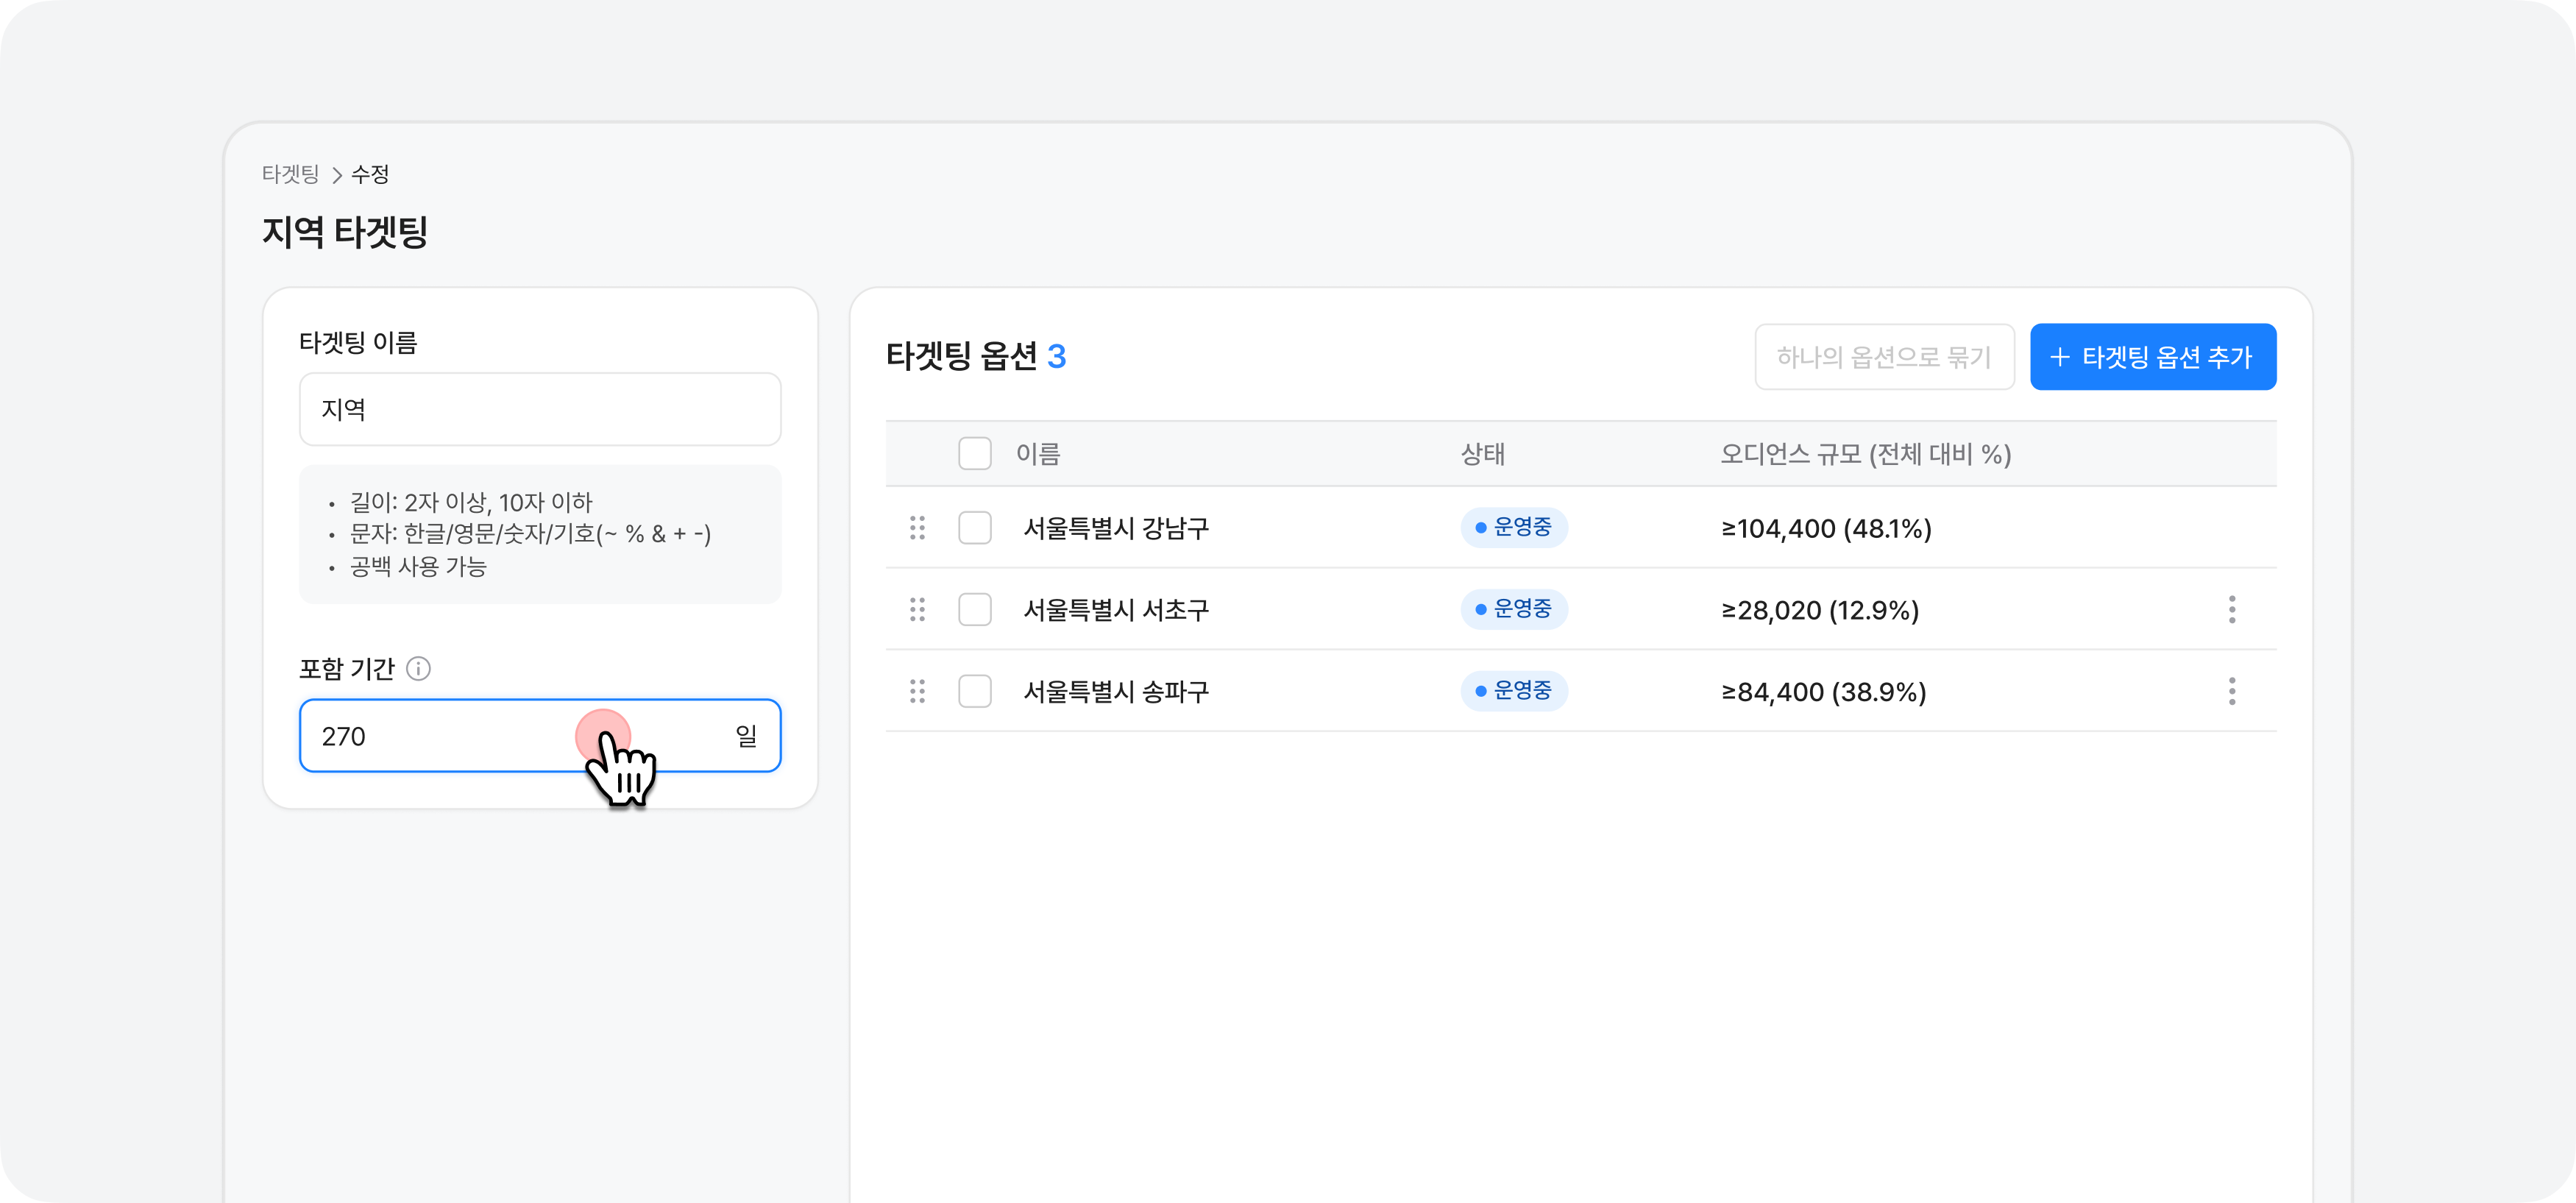 ### Duration Example
* Target condition: Resides in Gangnam-gu, Seoul
* Duration: 30 days
* When a user first meets the Gangnam-gu Seoul condition, they're included in the audience for 30 days from that point.
* If 30 days pass without meeting the condition again, they're automatically excluded from the audience.
* If they meet the Gangnam-gu condition again within 30 days, the duration renews for another 30 days from that point.
### Modifying Duration
1. Click **Targeting → Audience** in the left menu.
2. Click on an existing targeting or create new targeting and select options.
3. Modify the 'Duration' in the left section.
4. Click the Save Changes button.
***
## Next Steps
{/*
Learn how to measure ad conversion performance
*/}
Learn how to create content-based targeting
Learn how to connect targeting to ad products
***
## FAQ
More granular targeting options mean smaller audience sizes. If too small, advertisers may not select them or ad impressions may be insufficient. Find a balance between meaningful scale and precision for advertisers.
Use the bundle options feature. Even if individual options have small audiences, bundling related options into one provides meaningful scale to advertisers. For example, bundle "Busan New User" and "Jeju New User" to sell as "Coastal New User".
Errors occur when invalid values are entered in each row. For example, required fields may be missing or values may not match the expected format. The rows with errors are displayed, and you can create the targetings by correcting the issues and re-uploading the file.
### Duration Example
* Target condition: Resides in Gangnam-gu, Seoul
* Duration: 30 days
* When a user first meets the Gangnam-gu Seoul condition, they're included in the audience for 30 days from that point.
* If 30 days pass without meeting the condition again, they're automatically excluded from the audience.
* If they meet the Gangnam-gu condition again within 30 days, the duration renews for another 30 days from that point.
### Modifying Duration
1. Click **Targeting → Audience** in the left menu.
2. Click on an existing targeting or create new targeting and select options.
3. Modify the 'Duration' in the left section.
4. Click the Save Changes button.
***
## Next Steps
{/*
Learn how to measure ad conversion performance
*/}
Learn how to create content-based targeting
Learn how to connect targeting to ad products
***
## FAQ
More granular targeting options mean smaller audience sizes. If too small, advertisers may not select them or ad impressions may be insufficient. Find a balance between meaningful scale and precision for advertisers.
Use the bundle options feature. Even if individual options have small audiences, bundling related options into one provides meaningful scale to advertisers. For example, bundle "Busan New User" and "Jeju New User" to sell as "Coastal New User".
Errors occur when invalid values are entered in each row. For example, required fields may be missing or values may not match the expected format. The rows with errors are displayed, and you can create the targetings by correcting the issues and re-uploading the file.